How to Install Next.js on Ubuntu 22.04
Next.js is a free, open-source, and production-grade React application that gives you building blocks to create superfast and extremely user-friendly web applications. It is created by Vercel and enables React-based web applications with server-side rendering and generating static websites. Next.js can handle all configurations needed for React and provides additional features and optimizations for your application.
This tutorial will show you how to install Next.js with Nginx as a reverse proxy on Ubuntu 22.04.
Prerequisites
- A server running Ubuntu 22.04.
- A Valid domain name is pointed to your server IP.
- A root password is configured on the server.
Install Node.js
Before starting, Node.js must be installed on your server. First, install all the required dependencies using the following command:
apt install curl gnupg2 wget -y
Next, add the Node.js repository with the following command:
curl -sL https://deb.nodesource.com/setup_18.x | bash -
Once the repository is added, you can install the Node.js using the following command:
apt install nodejs -y
After the installation, verify the Node.js version using the following command:
node -v
You should see the following output:
v18.12.1
You can also verify the NPM version using the following command:
npm -v
You should see the following output:
8.19.2
Create a Next.js Application
You can use the npx tool to create a Next.js application. npx is a CLI tool that makes it easy to install and manage dependencies hosted in the npm registry.
Run the following command to create a Next.js application named nextapp:
npx create-next-app nextapp
You should get the following output:
Need to install the following packages:
  [email protected]
Ok to proceed? (y) y
? Would you like to use TypeScript with this project? … No / Yes
? Would you like to use ESLint with this project? … No / Yes
Creating a new Next.js app in /root/nextapp.

Using npm.

Installing dependencies:
- react
- react-dom
- next
- typescript
- @types/react
- @types/node
- @types/react-dom
- eslint
- eslint-config-next

added 237 packages, and audited 238 packages in 20s

78 packages are looking for funding
  run `npm fund` for details

found 0 vulnerabilities

Initializing project with template: default

Success! Created nextapp at /root/nextapp
Once you are finished, you can proceed to the next step.
Run a Next.js Application
After creating a Next.js application, change the directory to the nextapp and run it with the following command:
cd nextapp
npm run dev
You will get the following output:
> [email protected] dev
> next dev

ready - started server on 0.0.0.0:3000, url: http://localhost:3000
event - compiled client and server successfully in 3.2s (154 modules)
Attention: Next.js now collects completely anonymous telemetry regarding usage.
This information is used to shape Next.js' roadmap and prioritize features.
You can learn more, including how to opt-out if you'd not like to participate in this anonymous program, by visiting the following URL:
https://nextjs.org/telemetry
Press the CTRL+C to stop the application. Then, build the application using the following command:
npm run build
You will get the following output:
> [email protected] build
> next build

info  - Linting and checking validity of types
info  - Creating an optimized production build
info  - Compiled successfully
info  - Collecting page data
info  - Generating static pages (3/3)
info  - Finalizing page optimization

Route (pages)                              Size     First Load JS
? ? /                                      4.83 kB        83.7 kB
?   ? css/ae0e3e027412e072.css             707 B
?   /_app                                  0 B            78.9 kB
? ? /404                                   212 B          79.1 kB
? λ /api/hello                             0 B            78.9 kB
+ First Load JS shared by all              79.2 kB
  ? chunks/framework-0f397528c01bc177.js   45.7 kB
  ? chunks/main-5cebf592faf0463a.js        31.8 kB
  ? chunks/pages/_app-05f53d08443c56f6.js  402 B
  ? chunks/webpack-2369ea09e775031e.js     1.02 kB
  ? css/ab44ce7add5c3d11.css               247 B

λ  (Server)  server-side renders at runtime (uses getInitialProps or getServerSideProps)
?  (Static)  automatically rendered as static HTML (uses no initial props)
Next, start the Next.js application using the following command:
npm start
You should see the following output:
> [email protected] start
> next start

ready - started server on 0.0.0.0:3000, url: http://localhost:3000
Press the CTRL+C to stop the application.
Manage Next.js Application with PM2
PM2 is an advanced process manager for production Node.js applications. It allows you to keep applications alive forever.
To install the PM2, run the following command:
npm install pm2@latest -g
Next, start your Next.js application using the PM2 by running the following command:
pm2 start "npm start"
You will get the following output:
[PM2] Starting /usr/bin/bash in fork_mode (1 instance)
[PM2] Done.
???????????????????????????????????????????????????????????????????????????????????????????????????????????????????????????????????????????
? id  ? name         ? namespace   ? version ? mode    ? pid      ? uptime ? ?    ? status    ? cpu      ? mem      ? user     ? watching ?
???????????????????????????????????????????????????????????????????????????????????????????????????????????????????????????????????????????
? 0   ? npm start    ? default     ? N/A     ? fork    ? 1321     ? 0s     ? 0    ? online    ? 0%       ? 24.5mb   ? root     ? disabled ?
???????????????????????????????????????????????????????????????????????????????????????????????????????????????????????????????????????????
At this point, the Next.js application is started and listens on port 3000. You can check it with the following command:
ss -antpl | grep 3000
You will see the following output:
LISTEN 0 511 0.0.0.0:3000 0.0.0.0:* users:(("node",pid=1337,fd=18))
You can also check the status of your Next.js application with the following command:
pm2 show "npm start"
You will get the following output:
 Describing process with id 0 - name npm start
???????????????????????????????????????????????????????????
? status            ? online                              ?
? name              ? npm start                           ?
? namespace         ? default                             ?
? version           ? N/A                                 ?
? restarts          ? 0                                   ?
? uptime            ? 59s                                 ?
? script path       ? /usr/bin/bash                       ?
? script args       ? -c npm start                        ?
? error log path    ? /root/.pm2/logs/npm-start-error.log ?
? out log path      ? /root/.pm2/logs/npm-start-out.log   ?
? pid path          ? /root/.pm2/pids/npm-start-0.pid     ?
? interpreter       ? none                                ?
? interpreter args  ? N/A                                 ?
? script id         ? 0                                   ?
? exec cwd          ? /root/nextapp                       ?
? exec mode         ? fork_mode                           ?
? node.js version   ? N/A                                 ?
? node env          ? N/A                                 ?
? watch & reload    ? ?                                   ?
? unstable restarts ? 0                                   ?
? created at        ? 2022-11-12T13:30:39.734Z            ?
???????????????????????????????????????????????????????????
 Divergent env variables from local env


 Add your own code metrics: http://bit.ly/code-metrics
 Use `pm2 logs npm start [--lines 1000]` to display logs
 Use `pm2 env 0` to display environment variables
 Use `pm2 monit` to monitor CPU and Memory usage npm start
Once you are finished, you can proceed to install and configure Nginx.
Configure Nginx as a Reverse Proxy for the Next.js Application
It is a good idea to install and configure Nginx as a reverse proxy to access the Next.js application.
First, install the Nginx package with the following command:
apt install nginx -y
Once the Nginx is installed, create an Nginx virtual host configuration file:
nano /etc/nginx/conf.d/next.conf
Add the following configurations:
server {

  server_name next.example.com;

  location / {
    # Reverse proxy for Next server
    proxy_pass http://localhost:3000;
    proxy_http_version 1.1;
    proxy_set_header Upgrade $http_upgrade;
    proxy_set_header Connection "upgrade";
    proxy_set_header Host $host;
    proxy_set_header X-Real-IP $remote_addr;
    proxy_set_header X-Forwarded-For $proxy_add_x_forwarded_for;
    proxy_set_header X-Forwarded-Proto $scheme;
    proxy_set_header X-Forwarded-Host $host;
    proxy_set_header X-Forwarded-Port $server_port;

  }
}
Save and close the file. Then, verify the Nginx for any syntax configuration error:
nginx -t
You should see the following output:
nginx: the configuration file /etc/nginx/nginx.conf syntax is ok
nginx: configuration file /etc/nginx/nginx.conf test is successful
Next, restart the Nginx service to apply the changes:
systemctl restart nginx
You can also check the status of Nginx with the following command:
systemctl status nginx
You should see the following output:
? nginx.service - A high performance web server and a reverse proxy server
     Loaded: loaded (/lib/systemd/system/nginx.service; enabled; vendor preset: enabled)
     Active: active (running) since Sat 2022-11-12 13:35:46 UTC; 6s ago
       Docs: man:nginx(8)
    Process: 2023 ExecStartPre=/usr/sbin/nginx -t -q -g daemon on; master_process on; (code=exited, status=0/SUCCESS)
    Process: 2024 ExecStart=/usr/sbin/nginx -g daemon on; master_process on; (code=exited, status=0/SUCCESS)
   Main PID: 2025 (nginx)
      Tasks: 3 (limit: 464122)
     Memory: 3.3M
     CGroup: /system.slice/nginx.service
             ??2025 "nginx: master process /usr/sbin/nginx -g daemon on; master_process on;"
             ??2026 "nginx: worker process" "" "" "" "" "" "" "" "" "" "" "" "" "" "" "" "" "" "" "" "" "" "" "" "" "" "" ""
             ??2027 "nginx: worker process" "" "" "" "" "" "" "" "" "" "" "" "" "" "" "" "" "" "" "" "" "" "" "" "" "" "" ""

Nov 12 13:35:46 ubuntu22041 systemd[1]: Starting A high performance web server and a reverse proxy server...
Nov 12 13:35:46 ubuntu22041 systemd[1]: Started A high performance web server and a reverse proxy server.
Once you are done, you can proceed to the next step.
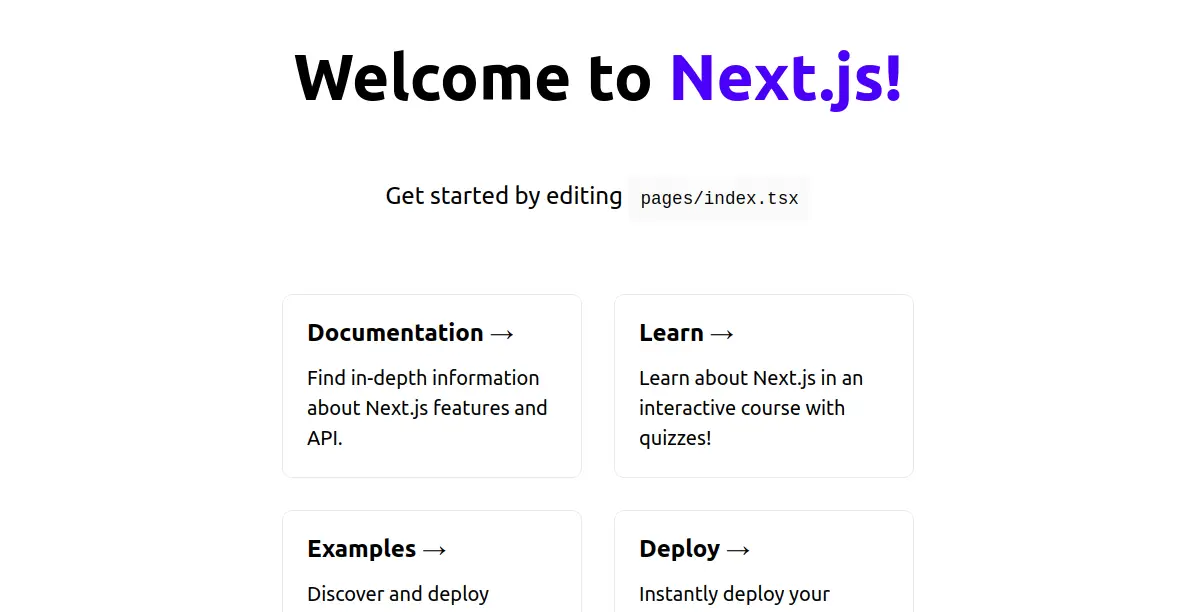
Access Next.js Web Application
At this point, the Next.js application is installed and configured with Nginx. You can now access it using the URL http://next.example.com. You should see the Next.js web page on the following screen:
Conclusion
Congratulations! you have successfully installed the Next.js application with Nginx on Ubuntu 22.04. You can now fast your development process using the Next.js framework. Feel free to ask me if you have any questions.

